Enterprise personalization software is typically complicated, expensive, and possibly overkill for a majority of eCommerce companies. In our experience, this leads many to avoid or delay implementing personalized experiences on their sites, which likely leaves revenue — and a better conversion rate — on the table.
So, to help more eCommerce brands implement personalized experiences that can increase conversions, we’ve begun developing a new process for personalizing eCommerce websites that solely uses Google Analytics and simple Javascript cookies. As a result, our method can work regardless of eCommerce platforms, marketing automation platforms, or in addition to any personalization technology already in place.
This process gives eCommerce brands the flexibility to “do” personalization on their own terms, from the spectrum of light personalization (a few custom experiences in specific situations) to as much personalization as they want (many customizations for large portions of their audience), all without bloated, expensive personalization platforms with inscrutable artificial intelligence or machine learning algorithms.
We’ve just begun developing this process at Inflow — we are actively applying it to client sites as we write this — but we’ve used these core concepts for a long time. Namely, our process is based on how we implement A/B tests for clients that aren’t using a 3rd party A/B testing tool.
In this article, we detail each step of our eCommerce site personalization process, using various eCommerce personalization examples throughout.
Note: If you manage an eCommerce business and want to know how this process could help your website personalization efforts, you can learn more and talk to our CRO team here.
Overview of Our eCommerce Personalization Process
Any eCommerce personalization process really just needs to do 2 things:
- Bucket online shoppers into specific personas
- Show custom (personalized) experiences to each persona.
Ours is no different, but let’s use some examples to get a sense of how this works.
First, a clothing store may want to know if an anonymous user is a man or woman. The user could (a) indicate their persona through their site interactions which (b) helps the store display products that they would be interested in.
Or, in a more subtle example, a yoga store would benefit from knowing whether a user is a beginner or an advanced yoga instructor. The bucketing of users (step a) in this case, is not as obvious as the man or a woman example above, but if they were able to do so, they could offer a personalized shopping experience (step b) for each group; showing beginner friendly items to one group and bulk discounts on commonly used items for instructors to the other group.
Our specific process for doing this breaks down into a 4 steps that we explain in turn below:
- Brainstorm and Bucket Personas
- Determine Characteristics and Site Behaviors
- Analyze Data
- Personalize the Website
Steps 1 – 3 are dedicated to the first goal: Bucket users into personas, which is the foundation of this process, while Step 4 is to show users a personalized experience depending on which bucket they are in (this is the easier, final step).
Step 1: Brainstorm and Group Personas Together
The first step is to brainstorm who your users are and bucket them into personas. This step lays the foundation for the entire personalization process because it determines the types of potential customers we’re going to personalize for.
It’s important to note that we aren’t tracking anything here, we are just making a hypothesis about who our users are based on their actions. By the end of this step we want to have solid hypotheses of what user personas could benefit from a custom site experience.
To use a specific example, one client we have, Mountain House, sells freeze dried food. They’ve noticed over time that two different types of customers (personas) use their products: preppers and backpackers.
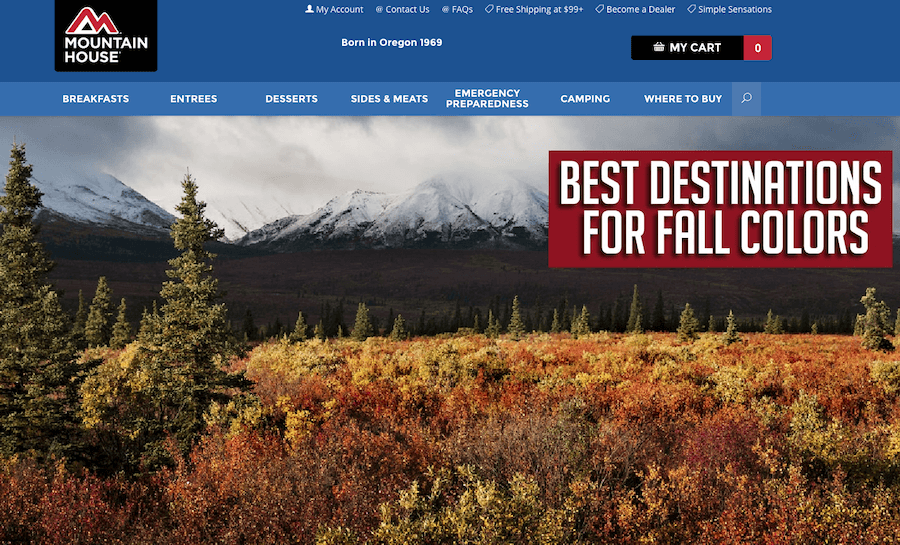
Preppers, or survivalists, are buying goods and food for potential emergency scenarios. Backpackers, of course, are buying goods and food for backpacking and camping trips.
They use similar products but have vastly different needs and goals. But we may hypothesize that if we knew whether a given user was a prepper or a backpacker, we could increase the site’s conversion rate by showing a custom experience, and more relevant products, to each. For example, buying in bulk could be good for preppers while backpackers will want to buy individual items, perhaps in more variety.
The details of your personas will depend on your particular store.

Once we finish creating our personas, the next step will be to think about the site behaviors that can indicate to us which persona an anonymous user belongs to. This will allow us to eventually cookie each user into a persona so we can later show them the proper personalized experience.
Step 2: Determine Characteristics and Site Behaviors That Indicate Which Persona a User May Belong To
Once we have the buckets from Step 1 we need to figure out what actions or behaviors can help us determine which persona new, anonymous, users belong to.
Some examples of these actions include:
- Viewing a category
- Purchasing a product
- Entering information into the website (i.e. searching for something)
- Clicking on the navigation menu
- Engaging with a module that helps narrow products
- Subscribing to an email list to receive relevant content
We’ll start by finding some obvious actions. Continuing on with our hypothetical clothing eCommerce store from above, viewing men’s jeans or bras for example could be a clear and obvious site behavior that indicates which persona (men or women) an anonymous user belongs to.
In some situations, finding a difference between personas is more difficult. Consider the yoga store example from earlier where we’re trying to differentiate between beginners and instructors. If there aren’t products or categories that clearly differentiate between the personas (both may buy yoga mats and clothing for example), one option is to use personalized content to help us differentiate.

If a new, anonymous user site visitor signs up to receive basic yoga instructions, for instance, we could safely assume they belong in the beginner bucket. Likewise, you might have, or be able to write, content targeted specifically at instructors or more experienced yogis that will help you identify and personalize those user experiences.
We have even been able to bucket an anonymous user by promising future personalized content in an email opt-in form. The act of offering this content can often convince a user to indicate their persona by allowing them to choose to receive relevant content.
Step 3: Track and Analyze Data to Confirm Actions That Will Bucket Users Into Personas
In Step 3, we’ll track and analyze the customer data we’ve been gathering and use it to figure out what actions are strongly indicative of an anonymous user’s persona. We’ll use these to actually personalize our site customer experience later on.
How to Setup Custom Dimensions to Track Site Actions
In Google Analytics (GA), we can track user actions using custom dimensions. A dimension in GA is a characteristic of a user, session, or even hit (page view or event). Typical dimensions in GA include Page, Source/Medium, Device, etc. and are sent to GA as part of any page view or event.
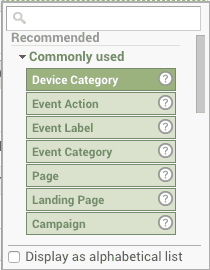
Custom dimensions are similarly not sent on their own, but must be sent as a parameter of another event or page view. For instance, if you wanted to log that someone viewed Men’s products in a custom dimension, you would have to either add the dimension to the page view of men’s product pages, or add an event to any clicks leading to men’s pages that would include the custom dimension.
For more information on how this works, check out the GA Help Article on Custom Dimensions here.
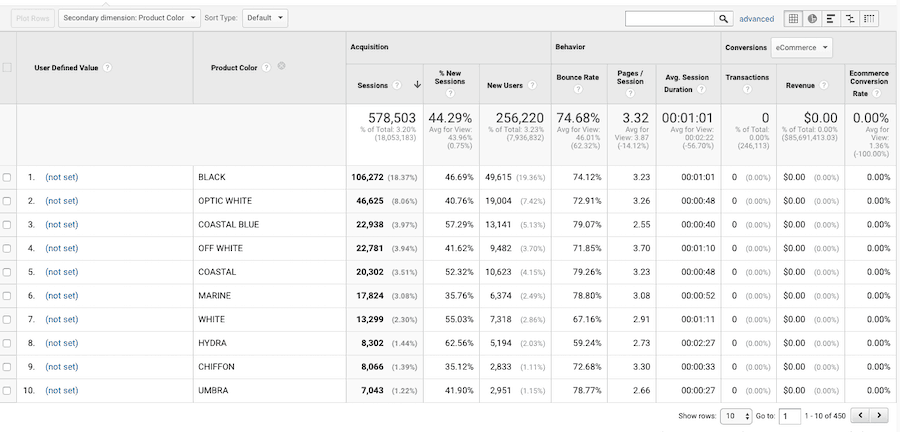
Once the dimension is in GA, you are then able to view reports based on whether someone has the dimension set or not, with separate line items for each value in the dimension.
For example, the image below shows a custom dimension with various “Product Color” values for a particular client. If we hypothesized that product color choice was indicative of a certain persona, we could use this data to help us bucket users into personas.
So for example, in our men/women’s apparel store, clicking on a women’s category might trigger us to set a custom dimension identifying this user as a woman in the customer journey.
In our yoga example, someone visiting an article on how to do beginner yoga poses might trigger us to set a dimension identifying this user as a novice, while someone visiting an article on mastering acroyoga moves might be pegged as an advanced user.
Compare Stats from Different Custom Dimensions to Finalize the Criteria for Bucketing Users Into Personas
So what actions should we track that will hopefully indicate whether an anonymous user belongs to a given persona?
This is a critical part of the process, and here’s how we typically do it.
First, we think of some “anchor actions” that almost definitely indicate the user is in a given persona. These are the ones you’re sure of. For example, in our hypothetical apparel online store, it’d be something like adding women’s jeans to their shopping cart indicates they are interested in women’s apparel, and adding men’s jeans indicates they’re interested in men’s apparel.
But (and this is key) just having a few anchor actions is not enough because it’s very likely that a large fraction of your site traffic will never take that action. If you only have a small number of dimensions that lead to a user being bucketed into a persona but, say, 50% of your traffic never takes those actions, then your personalization effort just won’t apply to a large percentage of your traffic, which means all your effort in personalization may not be as impactful as it could be.
So, second, you’ll want to liberally think of many other user actions that could also indicate a user should be bucketed into a given persona. Let’s call these “candidate actions”. These can be any of the action types we’ve been discussing so far: clicks on certain pages, adds items to cart, downloads a PDF, whatever you think could indicate a user belongs to a certain persona. Create custom dimensions for them in GA, as well.
Third, let some time pass, ideally a few weeks to collect data in GA.
Fourth, now compare how well the data from your candidate actions line up with your anchor actions. Basically you’ll assume the anchor actions are the source of truth for whether a user is in a specific persona. So each candidate action can be compared to the anchor actions to see, whether there’s overlap between users.
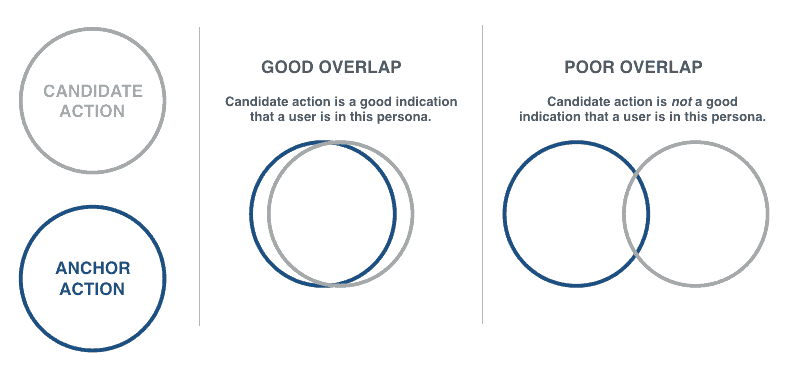
For example, let’s say you think downloads of certain content indicates a user is interested in women’s products. You’d compare and see, of the users who took this downloading action, what percentage also took the women’s anchor action vs. the men’s at various touchpoints with your site. If a decent fraction also took the men’s anchor action, your hypothesis that downloading this content indicated they were interested in women’s products is not likely to be true, so we’d discard this candidate action as not very telling of which persona a user belongs to.
From a high level, our goal here is to pick a handful (3-5) of the most indicative and consistent criteria for accurate personalization without going into too much detail. Too many details can lead to conflicting signals and make personalization too complicated. At some point if we keep adding behaviors, we’ll either have to use an algorithm or manually choose a prioritization to follow.
It’s important to note again that we still haven’t personalized anything on the site yet. Step 1, 2, and 3 are all about figuring out exactly who our personas are, how to bucket them, and what types of actions we can use to personalize our site and product recommendations.
Step 4: Personalize the Website
At this point we have clear buckets for our personas and we know what behaviors we can use to bucket a new user into each of them. Now we’re going to leverage the data we’ve gathered and finally set up the personalization for our site.
This is the easy part! If you’ve done the first 3 steps well, a good marketer can easily identify tests/personalized recommendations that are likely to move the needle.
To do this, we’ll start building a list of hypothesis of custom experiences that we could show to the different personas that we think could increase their chances of converting.
- Change homepage tiles to show products that appeal to one or the other
- Prioritize navigation to show the categories most likely to convert or have a high AOV to one persona or the other
- Change messaging and value proposition language in real-time on product pages around certain products (e.g. in our prepper vs. backpacker example, the same food could be positioned as “long lasting” (prepper) vs “light and delicious” (backpacker)
- Show messaging around abandoned cart items on the homepage, in pop-ups or somewhere else on the site
- Segment to a separate email newsletter to deliver more relevant email marketing campaigns to certain personas
- Show a specific upsell on checkout, or somewhere else onsite so the right visitors see better related products (to increase average order value)
To actually execute on this, we’ll code simple Javascript cookies, which we deploy through Google Tag Manager, that essentially say: if a user takes one of the actions indicative of persona A, show them the personalized experience(s) we’ve come up with for that persona.
Pro Tip: We recommend setting up these cookies as you do the research in Step 3 so that you already start building your cookied user list. That lets you start putting out personalized content much faster after you finalize your criteria.
What If a User Takes Conflicting Actions
We should emphasize that it’s important to keep your final custom dimension list small to minimize the risk that users take conflicting actions (one action indicates they’re in Persona A, another indicates they are in Persona B). But if that happens, you can simply choose certain actions as “trump cards” that outweigh others. Alternatively you could also just not personalize the site for users who take conflicting actions. As long as you keep the action set small, this should only apply to a small percentage of your total traffic.
Conclusion
We’re excited that this method of creating personalized eCommerce experiences involves no 3rd party software (besides GA, which so many online retailers use already) and offers lots of customizability.
If you see how this could apply to your eCommerce brand, you can reach out to our CRO team here or leave a comment below.


0 Comments